Saturday, September 29, 2018

Game 29 - Bazoe! Mahou Sekai

Bazoe! Mahou Sekai (バズー!魔法世界)
Released 7/23/1993, published by Hot B


One site that has reviews of most of the Super Famicom RPGs has a section with what he thinks is the 9 worst games. I've played a number of them (Maka Maka, Villgust, Light Fantasy, Cyber Knight, and Song Master). Bazoe! is in that list as well, but he admits it's a personal dislike. While this isn't a masterpiece, it's nowhere near as bad as those other games, especially if you play on an emulator with a speedup key.

The developer, Hot B, went out of business the day after the game was released, and there's also a story of the lead programmer disappearing during development, so some of the issues with this game might be due to unforeseen problems. Overall I would say so far this is a game with a good story (for 1993) but a bad system.

The instruction manual gives the backstory -- there was once the Gazelfan Empire, but that magic kingdom was destroyed by the "great catastrophe" and monsters overwhelmed the world. An order of knights formed and destroyed the monsters, and then the Gazel Kingdom was formed. But Gazel broke up when the knights, priests, and magicians struggled with each other. They separated into the Duelfan Kingdom, the Nefan Kingdom, and the Ralfan Kingdom respectively. But after a while they allied with each other. Currently there is peace, but the Mirror of Paru has foretold that a new era of demons is coming.
The game begins by letting you chose a sex, name, and parents' occupation. I went with the girl herbalist. She begins as a 14 year old level 1 girl, with no equipment. I don't know exactly what the choice of profession does -- when entering new areas she'll sometimes make a comment about the kind of herbs you can find in the area but you can't actually get any. So it may just be for atmosphere and background.

This is Kurisu's 14th birthday, and a magician named Nash comes to deliver Kurisu's father's dying request -- to have Kurisu become a magician like he was. Her mother is hesitant because she says it was magic that led to her father's death, but she vows to accomplish her father's wish.

The first task is to get an introduction letter to the magic school from her uncle, who is a Baron of a nearby area. Along the way we have the first fight.

The chief problem of this game, familiar to a lot of lower-quality games of this era, is the ridiculously high random encounter rate. The battles also move fairly slowly, and a game over sends you back to your previous save. So you can spend a lot of time in a dungeon just to be defeated by the boss.

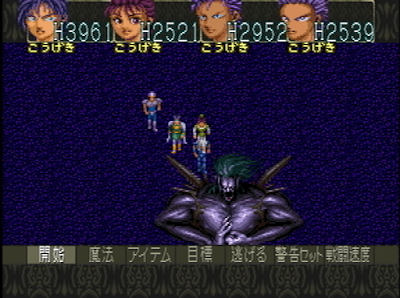
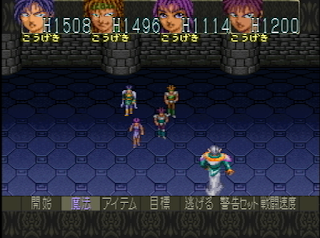
The battles start with the enemies and allies separate from each other. You can cast spells or fire bows, but to attack you have to close in, which takes two or three actions. The enemies may also try to close in on you. It's an OK idea but it makes the battles too slow for the encounter rate. Kurisu also starts out with no equipment or abilities, so you basically have to hide her while the bard Fale takes care of the enemies.
When you reach the edge of an area you move along a world map like the above. You can also sometimes hire ships or carriages to take you from town to town. Unfortunately despite the large number of spells in this game, there is no town warp spell, or dungeon warp spell. There's also no revive spell, which is a huge problem in a game where enemies can cast instant death spells -- another instance of poor balance.
Unfortunately Kurisu's uncle is rather mean and dismissive, and only when his son Romal (a knight) objects does he say that he'll write the letter if she can prove his worth. She starts out as a servant, but she does her duty. Finally under Romal's complaints the Baron says she needs to get his seal from a nearby tower. To prepare, she spends three months studying sword use under Romal, and is finally ready to go.
The enemies are pretty tough and I thought I was going to have to do a lot of slow grinding, but if you approach the tower you get two new companions -- the priest Lott, and his friend Mimas, who lost her family to slavers and doesn't talk much. With their help the tower is fairly easy.
Unfortunately it's being used by slavers, but we're able to free the slaves and find the seal. The boss starts to be a person named Croizel, but he runs away, leaving us to fight underlings.
With the seal, the Baron is happy to write the letter, and Romal joins her on her trip to Seles, where the magic guild is. They accept Kurisu, and she begins to learn magic.
She's a quick study with high aptitude, and learns the ice magic Chiru that her classmates can't. She also takes a bunch of classes. Eventually it's time to face the trial that will make her a beginning magician. It's a series of puzzles and traps in a tower. I failed the first time because I fought a statue (instant loss) instead of finding a hidden staircase. But on the second try I succeeded, and Kurisu became a real magician. She learns that the main goal of all magicians is to recover ancient magic lost in the great disaster.

I next had to select a master from three possibilities, which determines the spells you get automatically (other spells can be learned from scrolls). I chose Maclellan, the Spirit teacher. But after having played over half the game, I think a better choice is Balhalrik. The damage spells are poorly balanced and don't scale well -- that is, the upper level damage spells cost way too much MP for the extra damage they do. So Balhalrik's buff and exploration spells are probably more useful overall.

The way the magic system works is that you can have 16 spells at a time. If you have a scroll, you can cast the spell directly from the scroll, or go to a magic guild to learn it permanently if you're high enough level. Each school of magic has 8 levels of spells, but the 8th is a "lost" magic you can't buy or learn from guilds.

Now that I am an apprentice of Maclellan, he sends me off to pick up two medicines from Hybres. There's nothing to this mission beyond visiting Hybres and returning, but I stopped by mom's house on the way and she gave some words of encouragement.

Maclellan's next mission is to get the Eye of Gods from Dal city.
At Dal we learn that impostors picked up the Eye before we got there. A pickpocket named Milene gives us the valuable information that it was stolen by a priest of the Shar Telis religion. Fortunately, we're joined by Sedantes, who is also investigating the religion -- they're instigating a coup d'etat in the area under the name of General Jal.
After gathering some information at night, we break into the religious stronghold and expose the fake General Jal -- it turns out Sedantes is the actual Jal. At last we fight the religious leader, who is backed by none other than Skeletor Croizel, who runs away again. The fight isn't too hard, but magicians can be annoying in this game because they hide behind the fighters. If they cast sleep it's especially devastating because there's no way to wake someone up.

So Kurisu solves this problem, and Jal stays behind to work for liberation. Back at the magic school, Maclellan teaches Kurisu the last basic magic spell, and she is now officially a Low Rank Magician.
One year passes, while Kurisu works on her magic and Romall continues to train as a knight. Eventually we get another mission from Maclellan -- go to the ruins of Vamel to look for lost ancient magic. This requires a lot of travelling overland, which means a lot of random encounters, but finally Kurisu reaches Vamel. Along the way, the thief Milene is there again to tell us the sultan of Vamel is scared of the Burud race, and has teamed up with some strange allies to stop them.
At Vamel, the vizier approaches us and tells us about a mission for the Sultan -- find the Seal Mark below the city; if we don't trade that for protection, the Burud will destroy Vamel.

The dungeon has dark areas so I need either the Sunburst spell or torches, neither of which I had, so rather than facing tons of random encounters to go back and get them I just trudged through. The end of the dungeon has us fighting a monster named Jala, who became immortal but was then sealed away. He casts an instant death magic, which is devastating.
You have to fight him twice -- the second time he just spammed the instant death spell over and over again and I had no chance. Game over, and I was facing the repetition of about 90 minutes of random encounters to get back to him. Fortunately I had made a save state about 3/4 of the way through because I had to go to work, so I waited until Thursday until my first week of play was up and used that save state. Now that I could speed up through random battles the game got a lot more bearable as well.

The second time I fought him he didn't use as many of the death spells and I got some lucky resists, so he went down.
Jala wonders why he is sealed away when his sins are nowhere near as BAZOE -- this is some evil thing from the past, which is where the silly title comes from (why the exclamation mark, though?)

Now I return to the surface (no escape spell of course). I refused to give the seal to the Sultan, though, and rightly so -- it turned out the guy asking for it in exchange for protection was Croizel again, who grabs the seal and runs away. The Sultan wants our help dealing with the Burud, but very soon after this they destroy Vamel and block up the underground passage. Lott blames himself for some reason, but there's not much we can do -- we hope this will prevent Jala from coming out, but who knows?

Kurisu heads back to Seras, and another year passes while she studies magic -- she's now 17. This is about the halfway point (I think) so I'll stop here. As I said, the story is not bad but the gameplay is a disaster. It's not the worst of the worst, but they made a lot of bad decisions in the balance and system.

Tuesday, September 18, 2018

Game 28 - Moryo Senki MADARA 2 Review

Overall I would rate this game as below average, unfortunately. I know I'm putting a lot of games in this category -- I hope things will improve but maybe at the end of this I'll find out that I just don't like SFC RPGs as much as I thought I did!

I'm also considering switching to the review style I'm using on my other blog, but for now I'll stick to this.

Story/Characters: Both typical for this era. Characters have a minor backstory with a slight amount of development, but once that's done they hardly exist in the plot. Compared to the general quality of plots I've seen in all the games I've played so far this one is decent, but it's never going to stand with the greats of the genre.
  
World: The Madara world is basic fantasy; there are a bunch of different kingdoms and lands but for the most part there's not much difference between them. 
 
Game Flow: Because of the lack of control over the system, there are a number of choke points where it's hard to advance without grinding. There are also a fair number of times when it's hard to know what you're supposed to do next -- usually you can just explore around and you'll find something to do, though.

 
System: The battle system is disappointing. You mostly just watch things happen, and you have less control over what happens than you would even have in the standard "mash attack" system. Magic costs too much MP so you can't use it very often, although at least everyone can attack effectively.


Side Quests/Optional Content: Evidently a lot of the characters and events are optional, but I don't know how much content this equals in total. It's often hard to tell if you're on a sidequest or a main quest

Interface: Overall we're fine by this point -- none of the common irritants I've complained about in the past are in this game. The one head-scratcher is the way they implemented magic. As I said, there's nothing inherently wrong with choosing a spell, then who casts it, then the target. But it's not like any other RPG and I never got used to it.

Graphics/Sound: As one commenter pointed out, the graphics are pretty washed out and hard to see. The character designs make everyone look like 1980s punk rockers.

I finished Lady Phantom today (for the other blog) so I'll be back on Saturday with the first Bazoo! post. Actually consider this the Saturday post; I'm going to work on the Lady Phantom updates instead and post Bazoo! next Saturday.

Saturday, September 15, 2018

Game 28 - Moryo Senki MADARA 2 Part 4 (Finished)

Kurisu and the team of heroes has defeated Dakini, an avatar of Miroku. Dakini declares that he'll get revenge by sending the heroes to their death, but for some reason this just makes Kurisu wake up back on Earth (they never really explain this). Subaru finds him and they head back to the other world again, finding themselves near the village where the game started. Subaru is now an official party member.
Back in the other world, we find Sakuya at a shrine that was formerly empty. She tells us Miroku is still planning something and tells us to go to Mugenkyo, where Miroku is. Along the way we beat Kanhoryuki again, and then meet Jato, the rabbit mouki who has been annoying us.
Apparently Jato's real goal was to steal the sword from us and oppose Miroku himself, thus avoiding being just a puppet. You can choose to fight him or not; I let him run away.

In the Mugenkyo we have to defeat three bosses in three towers to open the way to Miroku's tower; they're all bosses that we faced before and none of them are especially hard. So now only the final dungeon is left.
Miroku reveals his plan (of course) before killing us -- he wants to break out of this cycle that Sakuya and Madara trapped him in, and hopes that if he gets all the Madara avatars together (i.e. our party) he can use our power combined to create a new world where he will rule alone.
Miroku is relatively difficult but I just kept casting spells and using the White Soma (heal everything) and eventually he went down. Of course we haven't beaten him, he'll be back in billions of years to threaten Earth again, blah blah blah.
I guess it's actually 5,600,070,000 years?
Kurisu and Subaru are returned to the surface, wondering if they dreamed it, but they think it was real. There's a slight bit on what the other characters do as well.
So that's Madara 2. I'll do the full review in a week but it was a disappointing game for me; not terrible, but the innovations they tried don't really work, and with washed out art and a boring battle system it can be a slog.

Next up will be Bazoo! Mahou no Sekai, but remember to check out Lady Phantom (a PCE game) on my other blog.

Saturday, September 8, 2018

Game 28 - Moryo Senki MADARA 2 Part 3

I didn't get as much time to play as I thought this week so I'm not quite finished. But the last post and the review will give me a buffer of a couple of weeks while I play Lady Phantom on the other blog.

I complained about the battle system last time; one additional complaint I have is that the spells are too slow. The battles move quickly for the most part, until you or an enemy cast a spell -- then it pauses for a while, shows an animation for each person that gets affected, then shows the damage individually for each character. It's far too slow given what they're trying to make the battle system to be.

Tablet 3

I am now starting to find the best equipment for some people -- this seems early, but each character has one particular equipment that boosts their attack or defense much more than anyone else who equips the stuff.

We're off to Fasie kingdom in the southwest, where the king seems to have been charmed by a priest of some cult, which is causing all kinds of strife around the kingdom.
We meet a girl at the bar named Marf, who is a treasure hunter that wants to go out to the ruins, but when we follow her out there she gets trapped by an earthquake. It turns out she is actually the princess of the kingdom, so it's imperative to save her -- fortunately there's a secret route into the ruins. We have to fight this mouki named Kanhoryuki again, but he's not very hard. In general the bosses in this game are not especially difficult, with some notable exceptions. They tend to have very low HP, in some cases almost the same HP as the grunts in the same dungeon. On the other hand, the damage the bosses do can be very high. You can be in a situation where the grunt enemies do 3-5 damage and the bosses do 600.

The main purpose of these ruins turns out not to be a tablet, but just an old etching that tells us some back story of the world -- Madara, Miroku, and Sakuya are three beings from outer space that fought a huge war, but then they agreed to cooperate to destroy, help, and rebirth the world in a cycle. Of course Miroku has ignored that and wants the power for himself.

Incidentally I'm also learning that a lot of the stuff in this game is optional; you don't have to get all of the people on your team or do stuff like this to win the game.
We still have to solve the issue of this evil priest. Next up we continue to an area with a magic school (finally a shop to buy magic; there aren't many of these in the game).  We're looking for a guy named Zaras but he is shut up in an observatory with Mouki. Once he's saved, and we beat a mouki that was hiding in the magic school, it's back to Fasie. Now that Zaras trusts us, we can borrow priest clothing from a guy in a monastery, and then sneak into the church. Unfortunately Daharka (the evil priest) recognizes us immediately and throws us into the Valley of the Dead. He hopes we'll die there.
But the enemies are just what we've been facing before so it's not that hard to escape, and then beat Daharka. Unfortunately this doesn't give us a tablet, so I don't know what the point was -- off to a desert town in the south where we finally do find the third tablet held by a mouki. I'm not sure if some even in the Daharka sequence was necessary to get this to happen, but there's no obvious story connection between the two.

Tablet 4

Next we head to Yamahiko town to supposedly learn why Madara is destroying the world although I'm not sure we ever do learn that -- instead we meet a guy named Koga Saburou who wants us to add a guy named Basara to our team. I didn't follow this part of the story completely but for some reason Koga burns down the town in order to have Basara escape his destiny of destroying things, however that works.

We then have to deal with Bunkan in the nearby capital, who is using a fake Emperor Dakini to rule the destroyed Cosara Kingdom. We'll have to wait until near the end to deal with Dakini, but now at least we can dispatch Bunkan, and then Koga lets himself die in order to free Basara from his fate -- once again, I'm not sure exactly what was going on there.
The last tablet is in the basement of Rasen Castle in the north, but the tablet will not let us take it without proving ourselves. To do that we have to beat the Mouki that are being used by a rival army. We do so, but it turns out we were just a decoy while the main force destroyed the rival army's castle -- oh well, at least we get the last tablet.

Tablet 5

Finally we can return all the way to Jofuku who initially sent us on this quest, and he reminds us that the 5th tablet is north of the Great Wall. The 4 tablets so far open the Great Wall, and we proceed to the north.

In the north we have to seek out the camp of the Mukuri tribe, which changes based on the "season" -- instead of day and night, this has four seasons, but it's basically the same thing and doesn't affect the game most of the time. At the camp, the last party member, Chaos, joins us. He leads us to the labyrinth where we find the final tablet. Now at least Kurisu can get to Yuiman to find Subaru.

The passage to Yuiman is in the Castle at the End of the World, where we use the 5 tablets. A fake castle is set up by Kanhoryuki who we fight yet again, but upon beating him, the way to Yuiman is open. Of course that rabbit mouki Jato tries to run up and get to Yuiman, but we finally manage to block him rather than just letting him do whatever.

Yuiman

Sakuya is waiting for Kurisu in Yuiman. Subaru is there also, but only her spirit. Her body is still with Emperor Dakini. To get to Dakini, there's another multi-fetch quest, this time to get the Yato Mirror, the Nisakani Jewel, and the Kusanagi Sword. The first two are in Yuiman, but the Kunasagi Sword is in a part of Yawato Kingdom (in the overworld) that we never got to. This is accessed by a cave north of Sakuya's town.

Wait a minute -- we spent over 50% of the game getting tablets to open up Yuiman, and all that time there was a passage there in Yawato that just had one dude guarding it (who probably would have let us past since he works for Sakuya). Why did the designers do that?
Anyway, once the three treasures are recovered we can finally return to Kosara Kingdom and beat Dakini. The first time I fought him, I thought it was an auto-lose story battle because he killed everyone except Kurisu in one hit. But no, this is actually what you have to fight.
His HP are rather low like most of the bosses, so it's mostly a matter of casting spells really quickly and hoping he attacks Kurisu, who can be healed. As you can see two of my guys died but I did manage to beat him.

Of course Dakini is just an avatar of Miroku so the game's not over yet -- there's only about 10% of the game left but I'll cover it in the last post.

Saturday, September 1, 2018

Game 28 - Moryo Senki MADARA 2 Part 2

I'm not a big fan of Madara's battle system. As I understand it, it's similar (or exactly the same?) as the one in Madara 1. It's a real time system where your characters and the enemies run around on a battlefield, reminiscent of Star Ocean. But you have no real options in combat. You can select a target, or use magic or items. You can't tell a wounded character to run away from the enemies, all you can do is watch them run in to get hit again and hope someone can get a heal spell off. You can't have a character stay away from the enemies to cast spells. You can't directly control anyone, or give them any direction. It becomes frustrating because too often you're watching the characters do dumb stuff and there's nothing you can do. This may also be why I've had to do more grinding in this game than in any game I've played up to now except Hokuto no Ken 5. When you give the player strong enemies and virtually no strategic options, grinding is the only way to progress in the game.

Now Kurisu has set out to find Subaru as the chosen hero. After solving the problem in the first area he's able to pass the barrier to the next kingdom, where there are several towns that have their own problems with the Mouki monsters, and the capital that doesn't want anything to do with you.

This includes a village who can't fish because a mouki has taken over the lighthouse, and a mine that can't mine anything because of Mouki. Both of these problems are fairly easy to solve, and along the way a wounded man named Seishinja joins the party. He can use healing spells. The fishing village allows you to deliver fish to the capital and then get the cook Fuyou to join you; she has also lost her memory.
Once Kurisu deals with the mine the guards are willing to let us past so we can talk to the sage Tataru and the king of the land. They want us to find a sword that was taken from the kingdom, and Tataru will try to find Subaru's whereabouts while we're gone. Jato (the rabbit enemy) is the one who stole the sword -- apparently he is looking for the way to the Yuiman Kingdom, where Sakuya-hime is.
This requires a trip to a village where they take a turtle to an island, and meet some mermaids. After solving the mermaids' Mouki problem (everyone has one!) they recover the sword and return to the capital.

Tataru tells us that Subaru seems to be in Yuiman, but that he also detects something like Subaru from a tower to the north. So of course we head there and it turns out that her blood is being used to bring back Emperor Dakini, an avatar of Miroku. We beat the priest but the ritual still succeeds, and Dakini seems to come back in a spiritual form, but not complete. This also somehow destroys the entire kingdom, so all the towns and castles are rubble. I guess it's time to move on to the next kingdom, then. Tataru did make it through, and he suggests that in Roran Kingdom we may be able to get information about Yuiman from another sage.
This other sage gives us the usual "mid-game overarching fetch quest" -- we have to find 5 stone tablets that will open the way to Yuiman. And we better do it fast because Dakini is building power.

Tablet 1

The first tablet is in a cave. A nearby town is having earthquake problems, but beating the nearby Mouki doesn't help. It turns out that actually it was the tablet's spirit itself that was causing the earthquakes to alert humans to the danger (huh!?)


Only a true hero can take the tablet, but that's Kurisu, of course.

Tablet 2

There are three small kingdoms at the south of the continent that are ruled by siblings. The brothers have started wars against each other and Mouki have invaded the sister's kingdom. But they do have a stone tablet in the mausoleum if all three siblings use their keys to open it -- so it's time to solve the problem here. The sister (Bibishii) gives us a letter to let us in to the other kingdoms. One brother won't meet us anyway, but the second is actually a Mouki. I had to do some grinding to beat him, but eventually I was able to.
It turns out that this king, Madara, was captured by a small island kingdom to the south with the help of Jato, and this Mouki replaced him. So we head down there and rescue Madara, who then decides to join us. There's an interesting fight then against one of Jato's monsters, but even if you lose, the game continues. Jato had been controlling the king of this small island kingdom but one of his underlings breaks the mind control. This solves all the problems, and with the 3 keys united, we're able to go into the catacombs and get the second tablet. Madara also joins the party.

That's all I've done for now -- 3 tablets left.

One final annoyance -- the way you cast magic is to first choose the spell, then who casts it. In theory there's nothing wrong with this but it's the opposite of every other RPG and I'm not sure I'll ever get used to it.